In this tutorial, you will learn how to create your own chatbot using the Python programming language and the Telegram API. Chatbots are increasingly popular and can have a wide range of applications, from automating tasks to interacting with users in real-time. I will guide you step-by-step through the development process, from the initial setup to the final deployment of your bot on the Telegram platform.
Tutorial Content:
- Introduction to chatbots and their significance today.
- Setting up a Python development environment.
- Creating a bot on Telegram and obtaining the access key (API key).
- Implementing basic communication between the bot and Telegram using the Telegram API.
- Developing custom functions and responses for the bot.
1. Introduction to chatbots and their significance today.
Chatbots have gained immense popularity in recent years due to their ability to streamline processes, enhance user experiences, and improve customer service. They are used in diverse industries, such as e-commerce, healthcare, and customer support, to automate tasks, provide instant responses, and offer personalized interactions. By leveraging natural language processing and machine learning techniques, chatbots can understand user input and generate appropriate responses, making them efficient and effective virtual assistants.
Understanding the significance of chatbots is essential as we embark on developing our Python chatbot. Throughout this tutorial, we will learn how to harness the power of Python and the Telegram API to create a functional chatbot that can interact with users and perform various tasks. So, let’s get started on this exciting journey to build our very own chatbot!
2. Setting up a Python development environment.
Setting up a Python development environment involves the following steps:
- Installing Python: We will download and install the latest version of Python from the official Python website. We will choose the appropriate version based on our operating system.
Visit the official Python website at python.org, click on the «Downloads» tab. Scroll down and find the latest version of Python for your Operating System. Once the installation is complete, open the Command Prompt and type
python --version- Choosing a Code Editor: A code editor is where we will write and edit our Python code. There are several options available, such as Visual Studio Code, PyCharm, and Atom. We will select a code editor that suits our preferences and install it.
- Creating a Virtual Environment: A virtual environment allows us to isolate our Python dependencies for different projects. We will create a virtual environment specifically for our chatbot project to keep our dependencies organized and avoid conflicts.
3. Creating a Bot on Telegram and Obtaining the Access Key (API Key)
Here’s a step-by-step guide to creating a bot on Telegram and obtaining the API key:
- Set Up a Telegram Account: If you don’t have a Telegram account already, download the Telegram app and create an account. This account will serve as the «owner» of your bot.
- Find the BotFather: In the Telegram app, search for «BotFather.» This is a special bot provided by Telegram to help you create and manage other bots.
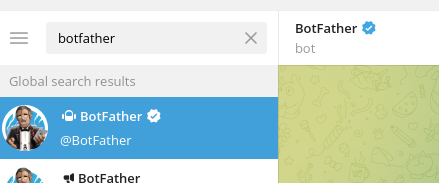
- Create a New Bot: Start a conversation with BotFather and follow the instructions to create a new bot. You will be prompted to provide a name and username for your bot. Once the process is complete, BotFather will provide you with an API key.
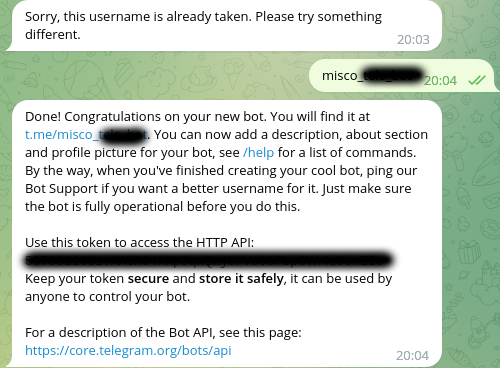
- Save the API Key: It’s crucial to save the API key securely as we will need it to authenticate our bot and establish the connection with Telegram. Store it in a safe place and make sure not to share it publicly.
With the API key in hand, we are now ready to integrate our Python code with Telegram and start building the chatbot. The API key acts as a unique identifier for our bot, allowing Telegram to route messages and commands to the correct recipient.
4. Implementing Basic Communication Between the Bot and Telegram Using the Telegram API
To establish communication between our Python code and Telegram, we will utilize the python-telegram-bot library, which provides a convenient interface for interacting with the Telegram Bot API.
Here’s a step-by-step guide to implementing basic communication with the Telegram API:
- Install the python-telegram-bot Library: Use pip, the package installer for Python, to install the python-telegram-bot library. Open your terminal or command prompt and run the following command:
pip install python-telegram-bot- Import the necessary modules: In your Python script, import the required modules from the python-telegram-bot library. This includes the telegram module, which provides the main functionality for interacting with the Telegram Bot API.
- Set up the Bot and API Key: Instantiate a telegram.Bot object using the API key obtained from BotFather. This will establish the connection between your Python code and the Telegram platform.
from telegram.ext import Application

# Replace 'YOUR_API_KEY' with your actual API key obtained from BotFather
API_KEY = 'YOUR_API_KEY'

# Instantiate your Application
application = Application.builder().token(API_KEY).build()- Define the Handler Functions: Define the handler functions to handle incoming messages, commands, and other events. These functions will be triggered when specific actions occur in the chat, allowing you to customize the bot’s behavior. In this example, you can print on console the messages from your users
async def handle_message(update: Update, context: ContextTypes.DEFAULT_TYPE):
    message = update.message
    username = message.from_user.username
    text = message.text
print(f"Message received from {username} : {text}")- Register the Handlers: Register the defined handler functions with the telegram.Dispatcher object. This will ensure that the appropriate handler is called when an event occurs.
application.add_handler(MessageHandler(filters.TEXT & ~filters.COMMAND, handle_message))- Start the Bot: Use the telegram.Bot object to start the bot by calling its start_polling() method. This will continuously listen for incoming updates from Telegram and trigger the registered handler functions accordingly.
application.run_polling()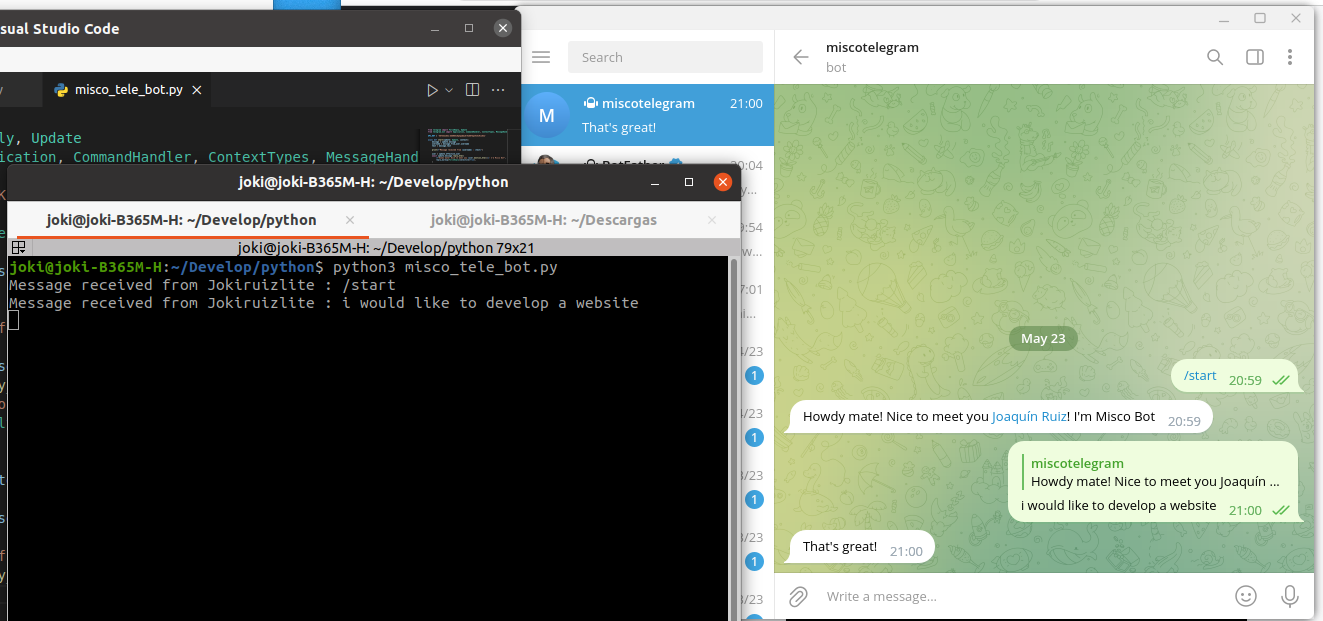
By following these steps, you will be able to establish the basic communication between your Python code and Telegram, enabling your bot to send and receive messages. In the next chapter, we will delve into developing custom functions and responses for your bot, making it more interactive and engaging.
5. Developing Custom Functions and Responses for the Bot
In this chapter, we will explore various techniques and strategies to develop custom functions and responses for our bot using Python. Let’s dive in!
1. Handling Messages:
- Text Messages: Implement a function to handle text messages received by the bot. You can analyze the user’s input, perform certain actions based on the content, and generate appropriate responses.
- Media Messages: Extend your bot’s capabilities to handle media messages, such as images, videos, or documents. You can process and respond to different types of media based on your specific requirements.
2. Implementing Commands:
- /start and /help: Create custom functions to handle the /start and /help commands. These commands can provide users with initial instructions and guidance on how to interact with your bot.
- Custom Commands: Define additional custom commands that are relevant to your bot’s functionality. For example, you could create a /weather command to fetch and display weather information.
3. User Input Validation:
- Implement input validation techniques to ensure that the user’s input meets certain criteria or follows specific patterns. This can help in handling incorrect or unexpected inputs gracefully and providing appropriate feedback to the user.
4. Integration with APIs and External Services
- Connect your bot to external APIs or services to enhance its functionality. You can fetch data from external sources, such as weather APIs or news APIs, and provide real-time information to your users.
5. Natural Language Processing (NLP):
- Integrate NLP libraries, such as NLTK or spaCy, to enhance the bot’s ability to understand and respond to natural language queries. This can enable more sophisticated conversations and make the bot more conversational.
By developing custom functions and responses, you can create a chatbot that is tailored to your specific requirements and provides a unique user experience.
Do you need help with this? Contact me to help you with your projects and watch my trainings!
Conclusion:
In this tutorial, you have learned how to develop a chatbot using Python and the Telegram API. You now have the tools and knowledge to create your own customized bot and explore the endless possibilities that chatbots offer in automation and user interaction.
I hope you enjoyed the tutorial and feel inspired to create your own bot!